Every thing you wanted to know about ADL with the new Nikon digital cameras, but didn't know who to ask! |
| |
This site is dedicated to
Nikon photographers who either
bought or are considering buying new cameras in 2008 and 2009. The D90
was
introduced as a consumer level camera and has many new and exotic
controls to
provide very high quality pictures straight out of the camera needing
only
minimal post processing. Owners of D3, D300 and D700 cameras will also
be able
to get a better understanding of how best to use their cameras by
reading this
material. Owners of previous generations of Nikon DSLRs will benefit
and learn that Picture Controls and D-Lighting can be used with the
current free Nikon View NX program to apply custom curves and adjust
their NEF images to have higher dynamic range and improve highlight
detail. Look to the right panel for more links on exposure and white
balance. |
|
||||||||||||||||||||||||
| |
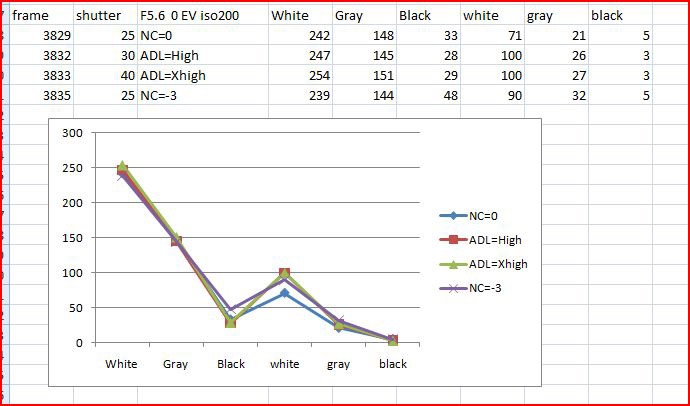
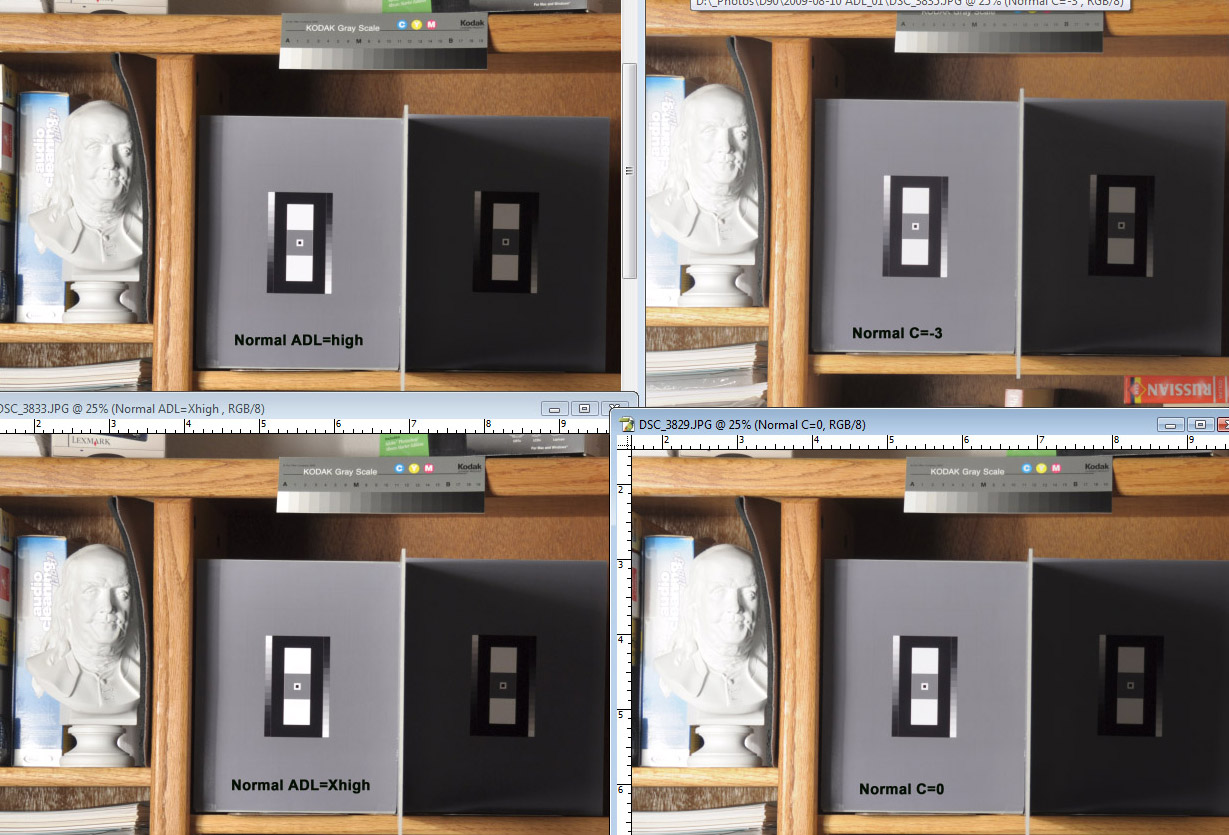
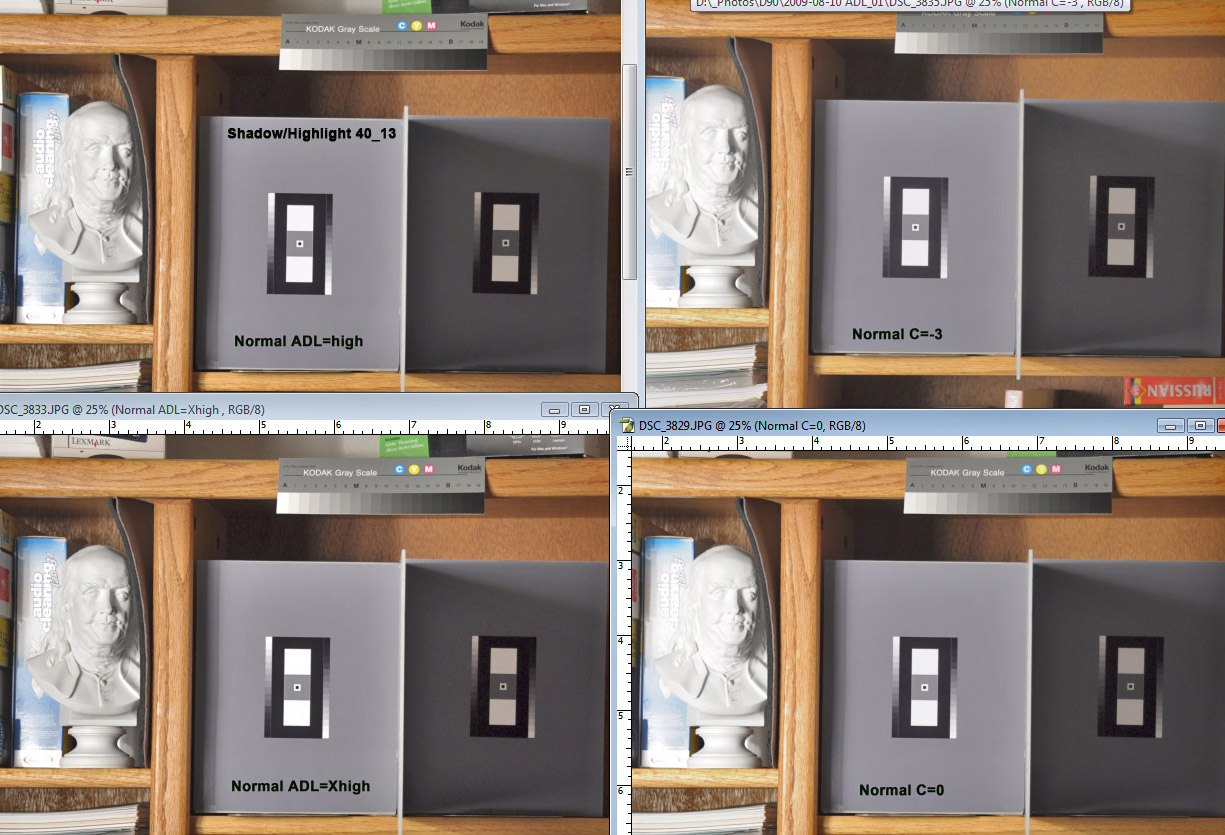
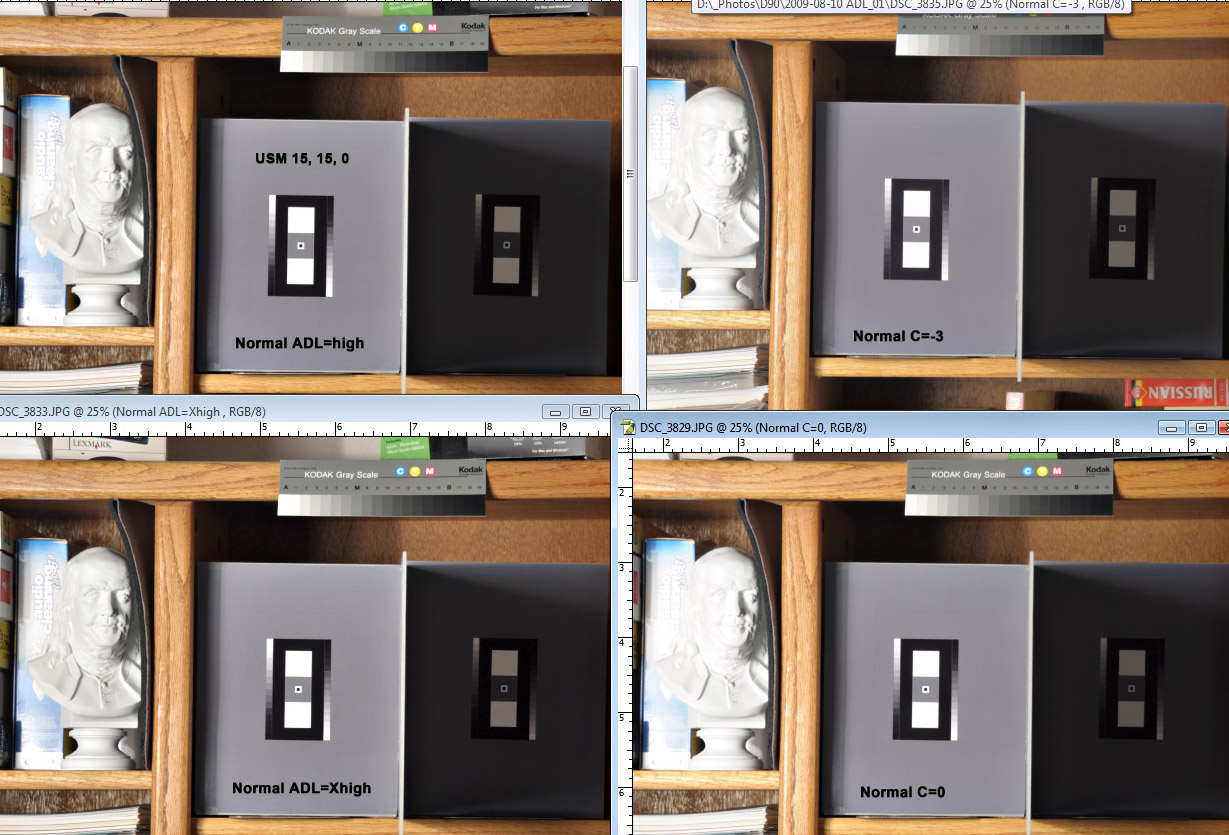
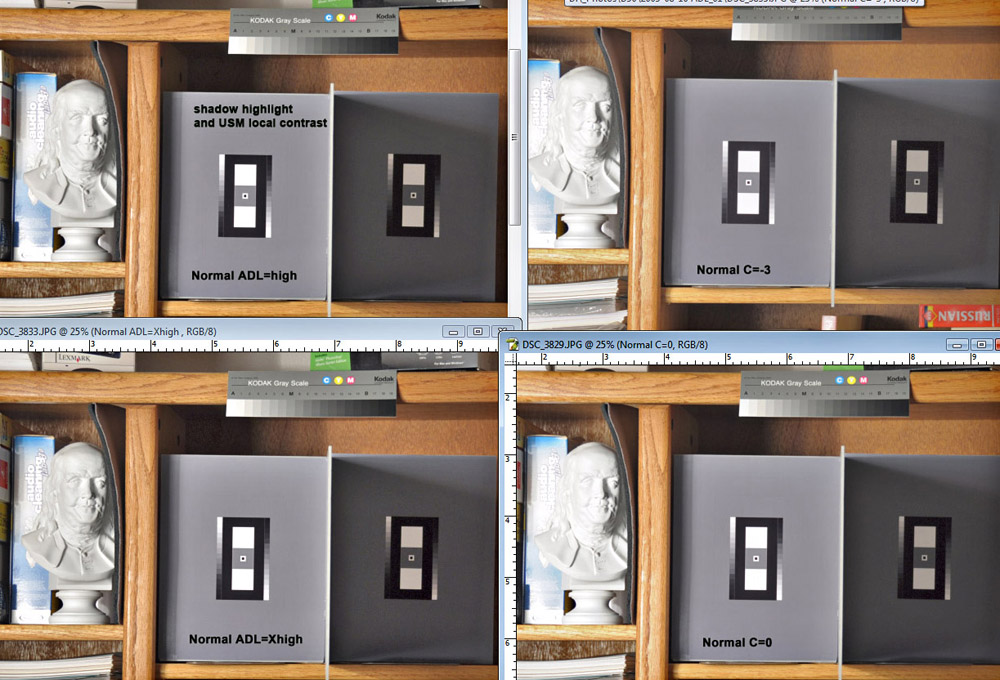
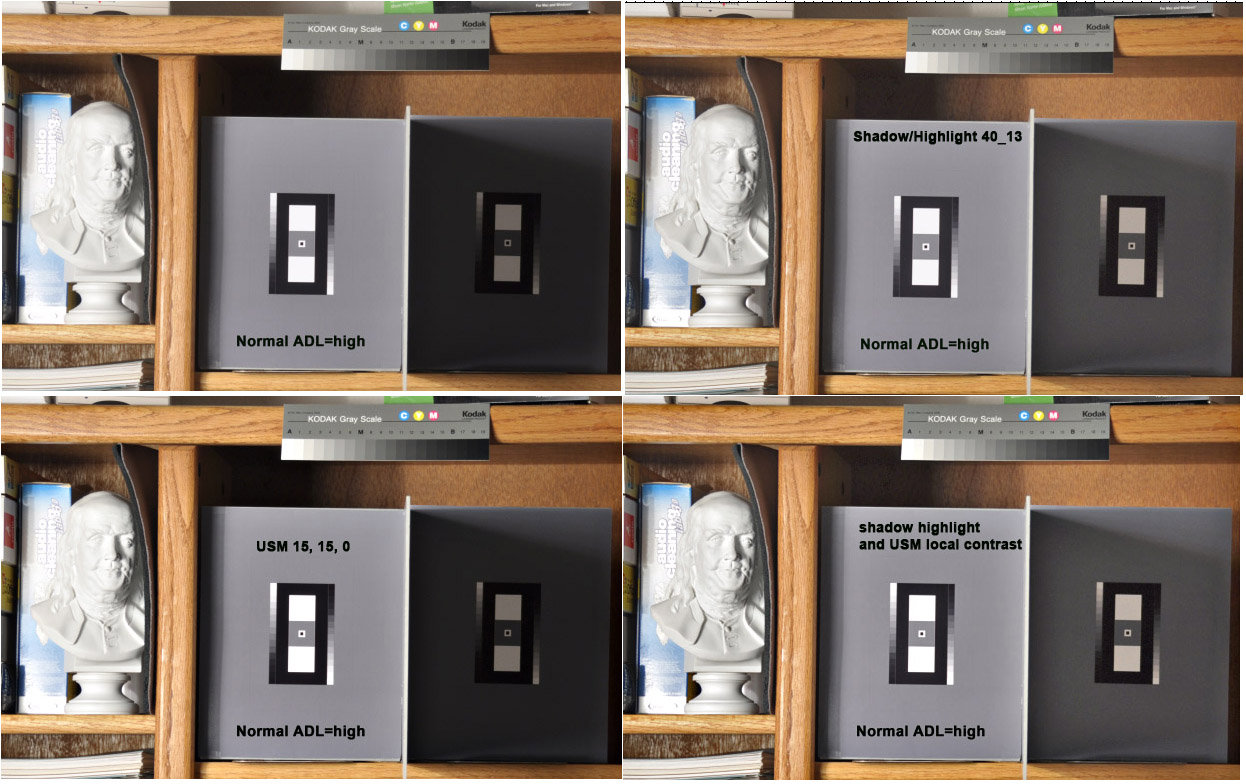
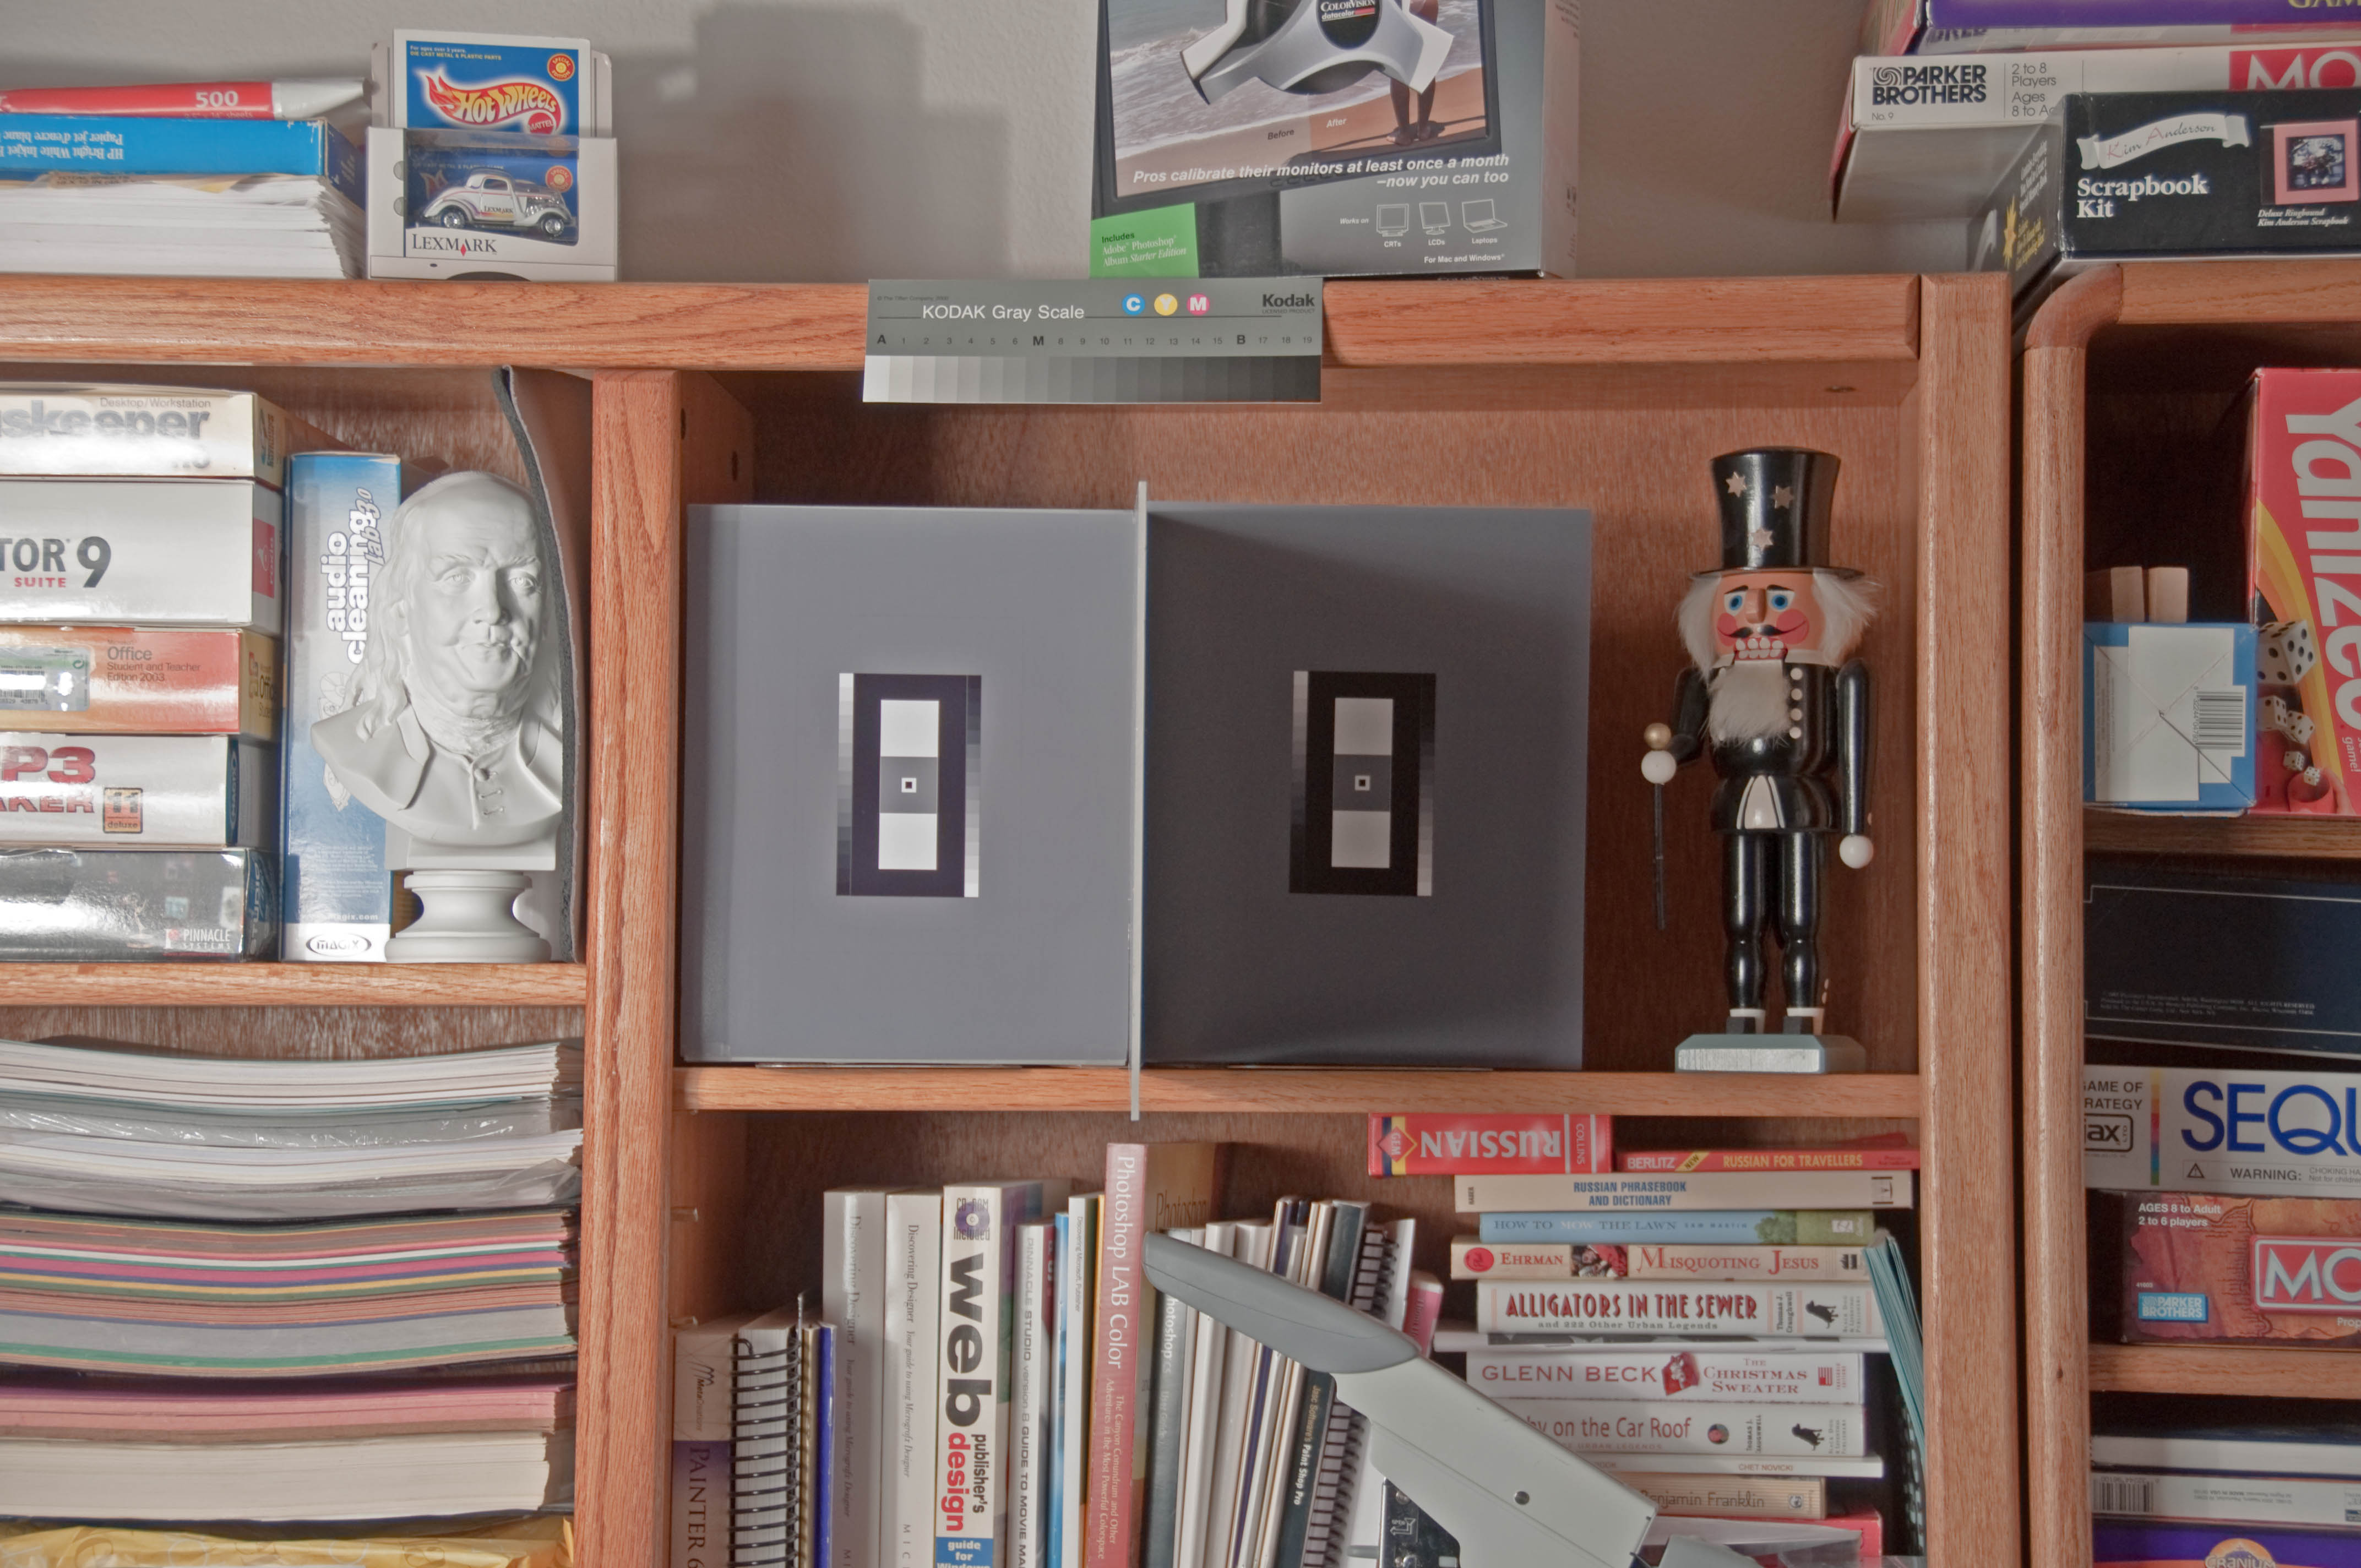
This page will continue to be updated as comments from posters in dpreview contribute their ideas. No one but the inventors and camera manufacturers know exactly how ADL works. These are attempts to reverse engineer the process by observing the results and extrapolating how it may have been accomplished. My original thesis was that ADL worked by shaping a tone curve to have high and low contrast segments based on the luminance data of the histogram. That idea was disproved by observing the discontinuity between the 3rd and 4th data points on the chart. The darkest value of the bright chart is lower than the brightest part of the shadow chart. The high and low contrast lines for Neutral Picture control are known to be one continuous curve and appear to be parallel to each other, differing only in contrast. ADL High and Extra High have a slightly different slope in the first three data points based on the difference in exposure and contrast. The shadow area of the histogram shows a jump in brightness shown by the diagonal line to match the slope of the minus 3 contrast line. This proves that the image had been masked into two areas for shadow and highlight and because of the overlap of the tones that they are not the product of one continuous tone curve. Although similar images can be processed using Shadow/Highlight in Adobe products and by using S curves whose flat areas correspond the the "valley" of the histogram curve typical of scenes taken at 90 degrees to the sun angle, only masking can produce these observed results. Nikon Capture NX2 contains the technology to isolate the tonal areas of sunlight and shadow based on the technology of NIK Software Inc. which are the producers of Capture NX2. If you look into the book "Photoshop LAB Color" by Dan Margulis, he suggests that tone curves with flat sections are useful in extending the percieved tonal range. Just place the flat sections in the valleys of the luminance curve and save the steep portions of the curve for where you need more contrast detail. I have always had difficulty making masks and applying them as my short term memory is a little disjointed. I have found that I can make different layers have different sharpness, blur or tonal range and that I can stack them so that I just use the eraser to remove what I don't want in the top layer. It is a simple concept and I can see what I am doing as I paint the picture. I selected some of the most promising images in the test to illustrate other methods of improving the image. If you are already working with raw imges your raw processor gives you the best oportunity to adjust tone at a point when you can deal with 4000 increments before you have to drop down to 255 increments. Adobe's Shadow/Highlight seems to work in 16 bit math eliminating some of the missing and doubled data points in the histogram. We should all be familiar with how "Levels" works and should use that tool first after we are sure of white balance. Levels allows you to select the white point and the black point and assign a "gamma" or brightness curve to move the middle gray tone. If you are not sure how levels works, consult the help section of your editor. I was able to confirm that I made my digital gray card properly by this excercise. I had determined that middle gray had a value of 137 and that if I used Matrix metering with zero contrast on Neutral Picture Control that I would produce exactly that tone on my captureed image. In short, 137 is what an 18% gray card should do for WB or exposure. In my charting for this project all lines converged at about 140 for every test regardless of exposure or contrast. I didn't plan it that way, it just worked. Look at the chart above to see that. How will this effect my use of ADL? Some of my critics say that I am quick to dismiss ADL, but I have found that I cannot always trust it to do the right thing. ADL needs to be triggered by a scene that is contrasty enough to require a mask. Several ADL levels did not trigger the mask in this series. How am I to know? Several dpreview threads have observed the dark halo effect of placing a bright object over a medium sky. The halo was a failed mask used to darken a white seagull or shiny tool. It was a puzzle that sucked me in because at that time I did not believe that ADL created masks. Stubborn as I am, I believe it now. My tools of choice to solve the high contrast problem are listed in order of importance to me. 1) Lower contrast, then lower exposure if needed. Watch the color histogram of the camera. The luminance histogram is useless on bright colors. 2) Install a Picture Control with an S curve and use it. 3) Use Levels to set black, white and middle points. (always in pp) 4) Use Shadow/Highlight for severe cases. 5) Use USM as a local contrast tool by setting wide radius and low application. 6) Stack two different layers made from the same image and erase the bad part from the top layer. 7) If you got to this point in the list with a problem image, it is too late. If you feel lucky, use ADL, but also make a raw image to use as a backup to apply 1 through 7 above. By the way, if you only shoot JPG and you have not clipped the high end too badly, the first 6 points can still save your image. © Leon Goodman 2009 |
|