
|
|
|
|
| 9 | D70 Backfocus Problem This site has become obsolete by new information. It stays here so as not to confuse search engines. For a new, more correct Forum on Focus issues go to: Does your camera have a focus problem?New link on Jan 13, 2006Revised December 26, 2005, see 2nd cam adjustment Hopefully the
life cycle of this page will be very short. There have been some
complaints with the newest Digital SLR of not getting the optimum focus
in some of the early cameras to hit the marketplace. Some users who
demand the best of focus are being disappointed. Nikon has not fully
embraced the problem and is adjusting some but not all of the
complaints. This page will suggest some options in dealing with that
problem.
Some History: The buggy whip manufacturers were not willing to admit that there was a decreasing market for their product when the horseless carriage became popular. So it is with cameras. Some things will be done differently as the technology improves. Ansel Adams is dead, now. We don’t need the black cloth and the eye loup and the ground glass to focus our large box cameras. We don’t need chemicals and enlargers and infinite patience to make fine images. Here is what the last ten years have given us and the buggy whips we no longer need.  Detailed images were made at 1/25
of a second at
f11 in bright sunlight with Kodachrome. That same picture can be taken
at 1/250 of a second with the D70. SLR cameras had split image prisms
in the viewfinder that could provide perfectly focussed images if you
remembered to use it. We now have auto-focus, auto-speed, auto-aperture
and auto-ASA as well as auto-color balance. The D70 camera starts at
ASA 200 as the lowest sensitivity. The kit lens starts at f4.8 at the
long end. Such a combination can reduce the cost of manufacturing
precision so that you can afford to have a digital SLR today. Getting
back the split image finder and keeping the auto-focus would greatly
increase the cost and make total adjustment very complex, three planes
of adjustment would have to be made instead of two. Detailed images were made at 1/25
of a second at
f11 in bright sunlight with Kodachrome. That same picture can be taken
at 1/250 of a second with the D70. SLR cameras had split image prisms
in the viewfinder that could provide perfectly focussed images if you
remembered to use it. We now have auto-focus, auto-speed, auto-aperture
and auto-ASA as well as auto-color balance. The D70 camera starts at
ASA 200 as the lowest sensitivity. The kit lens starts at f4.8 at the
long end. Such a combination can reduce the cost of manufacturing
precision so that you can afford to have a digital SLR today. Getting
back the split image finder and keeping the auto-focus would greatly
increase the cost and make total adjustment very complex, three planes
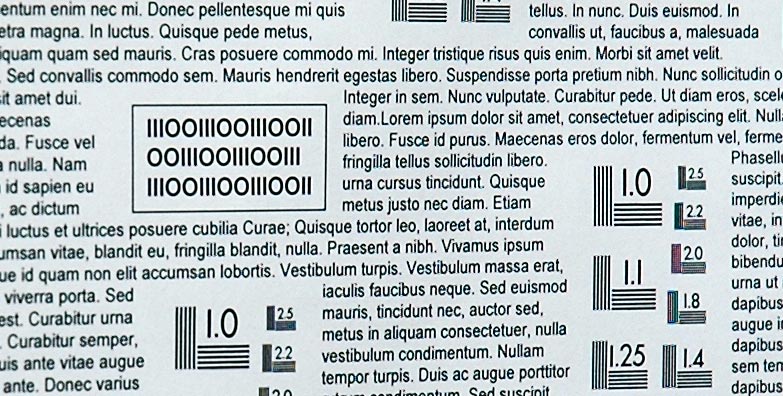
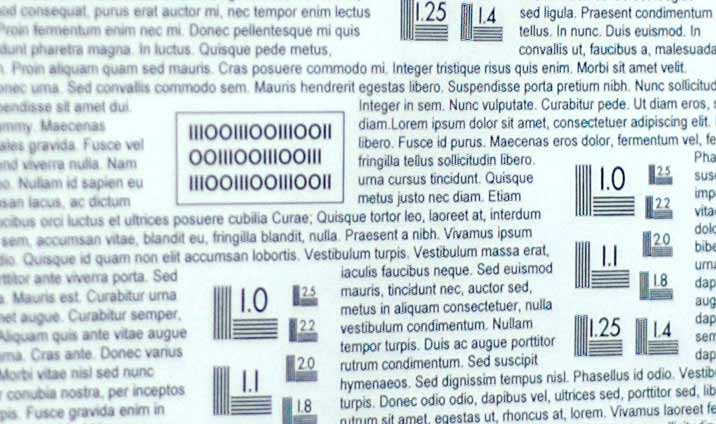
of adjustment would have to be made instead of two.So, the ground glass and focus aids have gone the way of the buggy whip and the black cloth. When you look through the viewfinder you see the automation and a very clear image to compose with. The photographer used to look at the ground glass with a magnifying glass. Now, he looks through the lens directly at the subject and the viewfinder lens and the lens of his eye all combine to make an image on the retina and macula and in the brain, BUT, the eyeball is a variable focus device and will accommodate a range of focus. So with this optical path there is no guarantee that what you see is also recorded on the CCD. This process used to be called a virtual or arial image, both of these words have new meanings today. 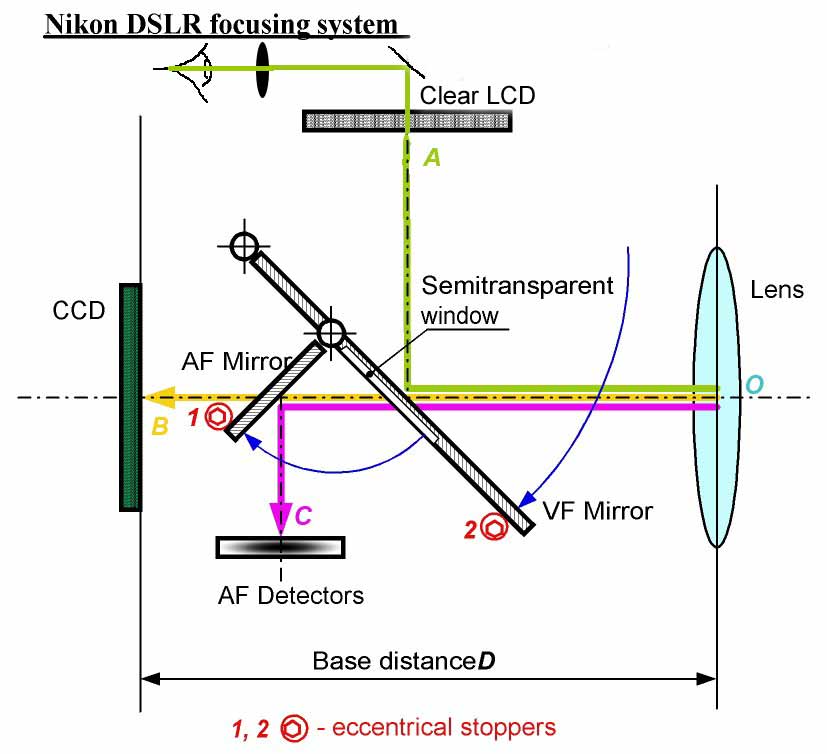 Sergei Khizhiy sheds light on the back-focus issue: From Russia comes a suggestion that the secondary mirror used to direct the image to the auto-focus device could be adjusted and could be done by anyone who had the confidence to do so. See http://dvdhelp.narod.ru/D70_back_focus.html Sergei’s web site seems to be very slow so I have mirrored it at http://leongoodman.com/sergei/backfocus.htm Make sure you come back here because the last few steps of his procedure have been changed. But first, are you sure you need to do this yourself and do you really have the problem? Having focussed computer microfilm systems and evaluated image systems for 40 years, I have gained some prejudices on how to judge a sharp image. Tiny text is the key, not lines in only one or two axis. The following link should bring up a printable PDF. Print in landscape. http://www.leongoodman.com/d70/focus.pdf The resolution targets may be sharper if you use the Word document below. https://leongoodman.tripod.com/d70/focus_target.doc Set up your target so the left side is nearer to the camera. The angle is not critical. 30 to 45 degrees will do. Distance can be 30 to 50 inches. Pick a lens with the widest aperture. The kit lens at 70mm wide open is very forgiving compared to a 50mm f1.8 lens. Check my examples to see what you should expect. Don’t worry about the focus target being at the same angle. It is narrow enough not to matter. The camera seems to be able to arbitrate where the middle is. On my Windows XP PC I just hook the USB cable to the camera and it comes up as a disk drive. I can open JPG or NEF files with Photoshop Elements 2.0 directly. Crop the image to the size of your target or smaller and display at 100% EXACTLY. Otherwise you cannot see every pixel. The sharpest image will be in the same vertical line as the focus target. If you have a back-focus problem the sharpest characters will be to the right of the focus target. On my kit lens there was slight fuzziness to the left of the target and much of the right side was acceptable. Then I got a 50mm f1.8 lens and the difference was dramatic. The sharpest image was 3 inches to the right and the target was fuzzy. It was then I decided to take the risk of making the adjustment. Remember the left side of the image will drop off very rapidly but the right side representing the area behind the focus point will fall off more gently. Figure 1/3 on the left and 2/3 on the right. You make the choice: Send it back to Nikon and they will surely fix it if it is grossly out but may not if it looked like mine. I have been in conflicts about acceptable tolerances before and didn’t want to get in that spot again. If your choice is to do it yourself, keep going. The tool used is a 2mm hex key wrench sold at Sears for $2.19. There are two wrenches, use the long one. Nikon has not volunteered a correct solution and as Sergei has suggested on his web site there doesn’t seem to be any other adjustments except the stops for the mirrors. The following is Sergei’s instructions up through step four. I have changed his procedure to align the manual focus adjustment. Turning the stoppers will not only change the distances, but it will also tilt the image, so, aligning the distances for the central (and also left and right) focus point can misalign distances for the upper and the lower focus points. This will limit your abilities to use mostly P, A, S and M modes and choose the central, left or right focus points. But you will get rid of the backfocusing for these points. SO, PROCEED AT YOUR OWN RISK. THE FOLLOWING PROCEDURE HAS NOT BEEN APPROVED BY NIKON, AND WILL NEVER BE. This is just a workaround to get sharp focus until Nikon offers a real solution for the problem. Several readers have suggested that artificial light is not good for checking auto focus and that daylight should be used if at all possible. Also suggested is that strong sharpening in post proccess will help you judge the optimal focus. I actually send the image to my laser printer and draw a line through the optimal focus for reference. 1. Print a test pattern like this one: https://leongoodman.tripod.com/d70/focus_target.doc Stick it to a flat vertical surface in front of the camera and light it brightly to help manual focusing. 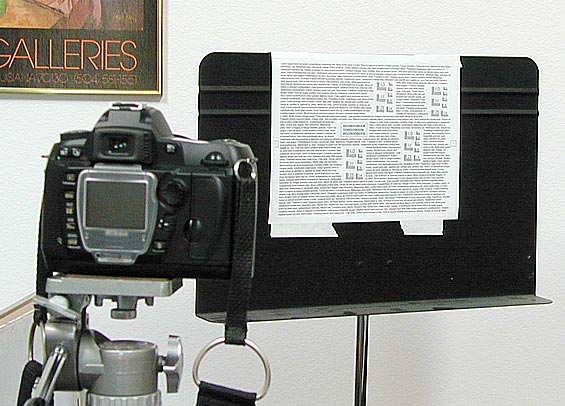 2. Mount the camera on a tripod and align it carefully against the test pattern. 3. Set the Aperture Priority mode on the camera and use the fastest aperture available (lowest f number). 4. Let the auto focus do its job and shoot. 5. Remove the lens, pull up the mirror, lock it in the upper position with an adhesive tape for convenience, mark the initial positions of the stoppers for a roll back, take a 2 mm hexagonal L-shaped wrench and rotate the AF stopper against its axis to a chosen direction by a few degrees. Try moving clockwise, first. Then unlock the mirror and put the lens back. 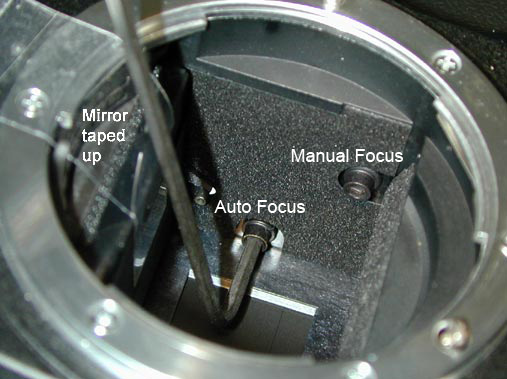 6. Download the images to a computer and see what part of the page is focussed best. If you are using the kit lens that may be a difficult decision. If using an f1.8 lens it will be obvious. This will give you a clue if you need to rotate the AF stopper some more or if you rotated it to the wrong direction and need to reverse it. Repeat steps 2...6 until you get a perfectly autofocused picture. 7. Now that you have done with the auto focus, proceed to the calibration of the manual focus alignment. It is done by turning the front stopper to a certain direction by a few degrees. This is the revision for 12/26/05. Moving cam 2 or the front cam will change the distance from the pentaprism matte glass in relationship to the distance from the image sensor. Make sure that you have set the diopter adjustment at the viewfinder eyepiece so that the matte texture and the focus rectangle are in a comfortable and sharp image irregardless of whether the camera lens is focused. Younger people have more tolerance to misadjustment than older people who have discovered bifocal glasses. Your ability to manual focus is very much dependent on correct optical adustment at the eyepiece. Using a tripod and turning off the auto focus try for the best focus you can get with the matte texture and target in focus simultaneously. Evaluate your results and adjust cam 2 for the next step which is to repeat step 7 until you can consistently get correct focus. 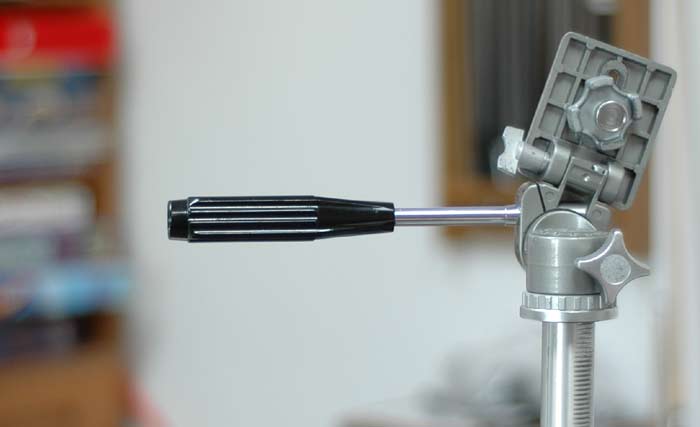 8. Go back and check autofocus one more time and correct if necessary. There is a slight interaction between the two mirrors. 9. You do not need the tripod for the next check. Use the pan handle of your tripod in a horizontal attitude set against a busy background. Or you could rotate your camera to a vertical angle and use a sign post. Set the camera on AF-C (autofocus continuous) Then look at the tripod handle depressing the shutter release halfway, while raising and lowering (or panning) the camera. Observe how the handle pops in and out of focus as you go up and down. If it does not pop in at the same distance from the focus box. Adjusting cam 2 may have moved the acual point at which the focus sensor snaps in, but you cannot do anything about it if correct manual focus is desired. Just remember where it snaps in for future reference when using auto focus. Stifle the desire to manual focus unless you have very good eyes and always remember that you point of reference is the matte surface and correct diopter ajustment at the eyepiece. Also try to use the center focus box exclusively. The other 4 boxes are a gimmick that robs you of the focus aids you used to depend on. Learn to focus in AF-S and hold the shutter at the half point, reframe the image for composition and then release the shutter. Maybe someday the engineers will give us back a split image focus aid, but the buggy whip is forever gone.
All pictures here have been adapted to the web and do not represent the detail and sharpness of the originals. The picture at the top of this frame is 8 inches high and 88 inches wide at 150 dpi. The hill peaks at each end are the same peaks. It was 120 MB while stitching together but is only 27 KB as you see it. Enjoy! |
||||||
| Early Film Scenics Fun Pictures People Home |